Rust ツールチェインのインストール
curl --proto '=https' --tlsv1.2 -sSf https://sh.rustup.rs | sh
rustupがインストールされます。rustupはRustのインストーラというだけでなく、一連のツールの管理も行ってくれるものです。
% source ~/.cargo/env
% rustc --version
rustc 1.44.0 (49cae5576 2020-06-01)
rustup show を実行すると以下のようにインストールされているツールチェインを確認できます。
% rustup show
Default host: x86_64-apple-darwin
rustup home:  /Users/shitara/.rustup

stable-x86_64-apple-darwin (default)
rustc 1.44.0 (49cae5576 2020-06-01)
Rustコンパイラの主な目的はRustのコードをマシンコードに変換することなので、実行ファイルをつくるためには各プラットフォーム用のバックエンドが必要になります。
デフォルトではrustupをインストールしたホストマシン用のコンパイラ(rustc)がインストールされます。
DockerのUbuntu上で試すと以下のようになりました。
% rustup show
Default host: x86_64-unknown-linux-gnu
rustup home:  /root/.rustup

stable-x86_64-unknown-linux-gnu (default)
rustc 1.44.0 (49cae5576 2020-06-01)
通常ではstable版がインストールされますが、他のプラットフォームやリリースチャネルをインストールすることもできます。
% rustup toolchain install nightly --allow-downgrade
% rustup toolchain install stable-x86_64-unknown-linux-gnu --allow-downgrade
リリースチャネルは以下の3つがあります。
- Nightly
- Beta
- Stable
Nightlyは毎日作られるリリースで、6週間ごとに最新のNightlyリリースがBetaリリースに昇格するようです。さらに6週間後にはBetaがStable(次の1.x)になります。
* プラットフォームについて
https://forge.rust-lang.org/release/platform-support.html
* リリースチャネルについて
https://doc.rust-lang.org/book/appendix-07-nightly-rust.html
基本的にリリースされるアプリケーションはコンテナでビルド・実行されることを考えると、手元の開発環境でクロスプラットフォームでコンパイルできる環境を用意しておく必要はないでしょう。
Cargo
rustupでRustのコンパイラ rustcがインストールされますが、直接rustcを使うことはあまりありません。Rustコードのテストやビルドはcargoと呼ばれるツールで行います。
rustupでセットアップしていれば`cargo`はすでにインストールされています。
% cargo --version
cargo 1.44.0 (05d080faa 2020-05-06)
Cargoはビルドツールであり、パッケージマネージャでもあります。プロジェクトのスケルトンの作成から、ビルド、テスト、実行などをやってくれます。
% cargo new hello_rust
% cd hello_rust

% cargo build
    Finished dev [unoptimized + debuginfo] target(s) in 0.00s

% ./target/debug/hello_rust
Hello, world!
cargo buildと実行を一緒にやってくれるrunコマンドもあります。
% cargo run
   Compiling hello_rust v0.1.0 (/Users/shitara/Dev/playgrounds/rust/hello_rust)
    Finished dev [unoptimized + debuginfo] target(s) in 1.93s
     Running `target/debug/hello_rust`
Hello, world!
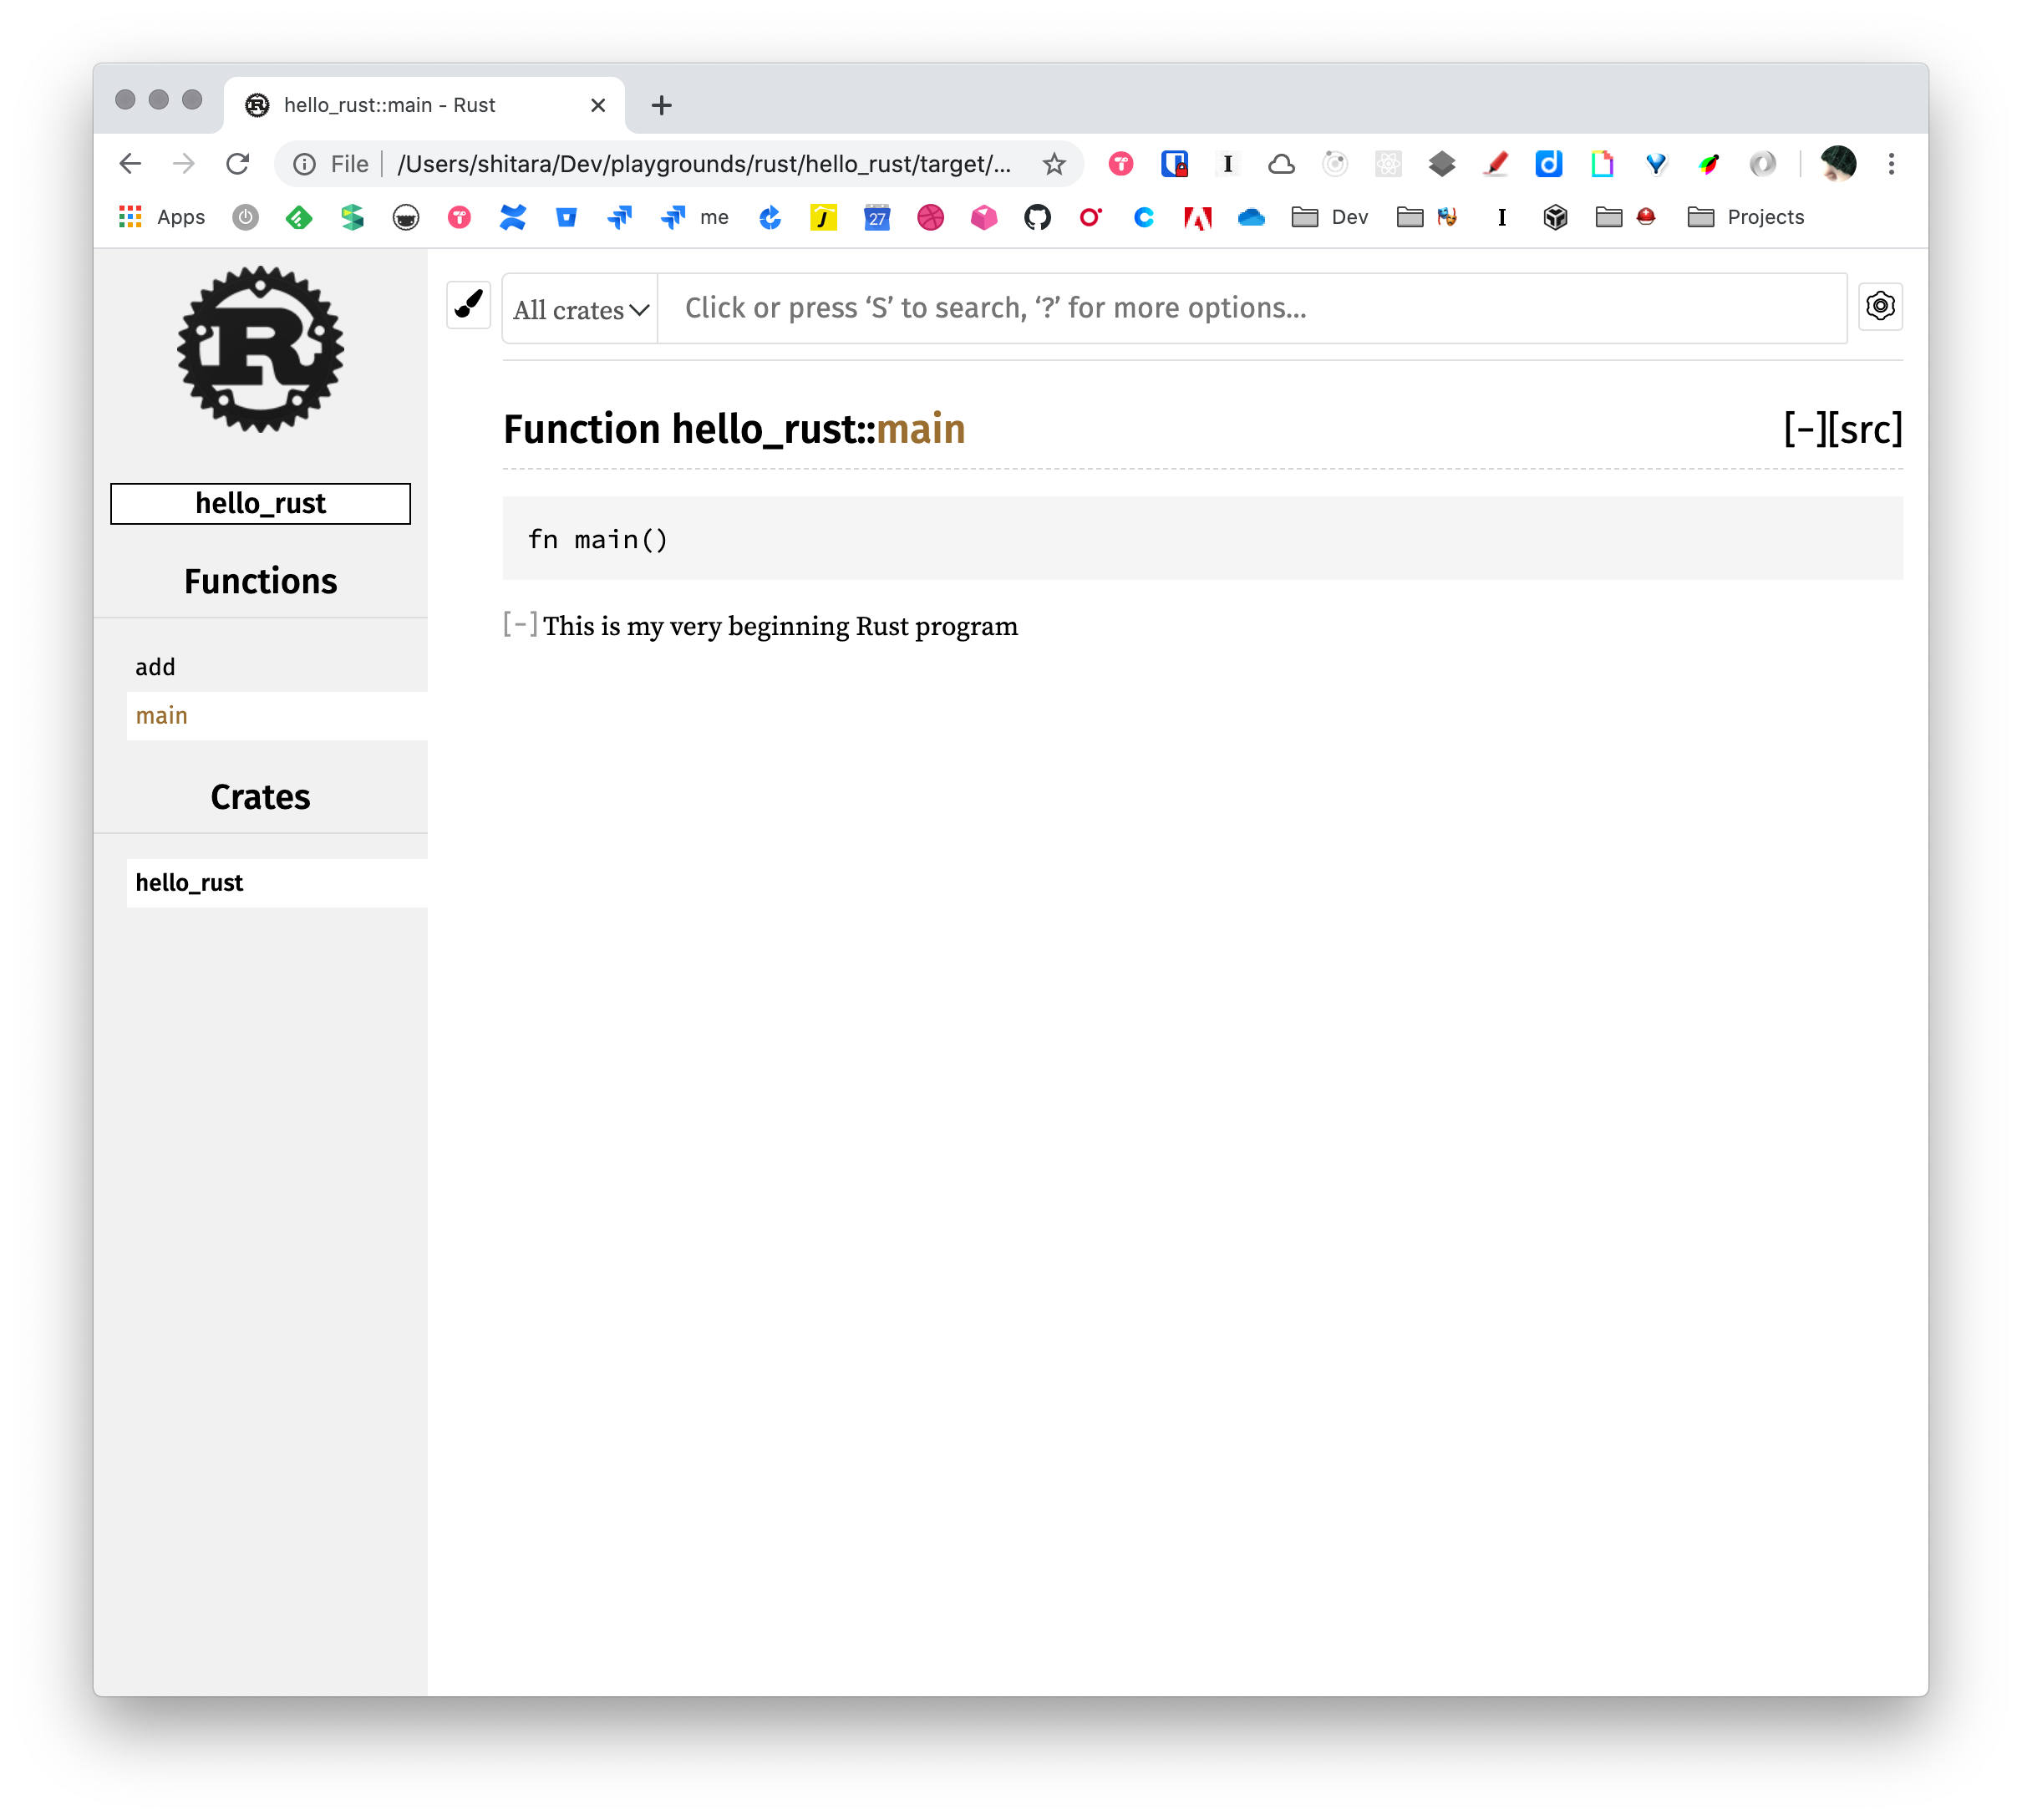
また、Cargoはプロジェクトのドキュメントも生成することができます。src/main.rsを以下のように編集します:
/// This is my very beginning Rust program
fn main() {
let result = add(1, 2);
println!("{}", result);
}
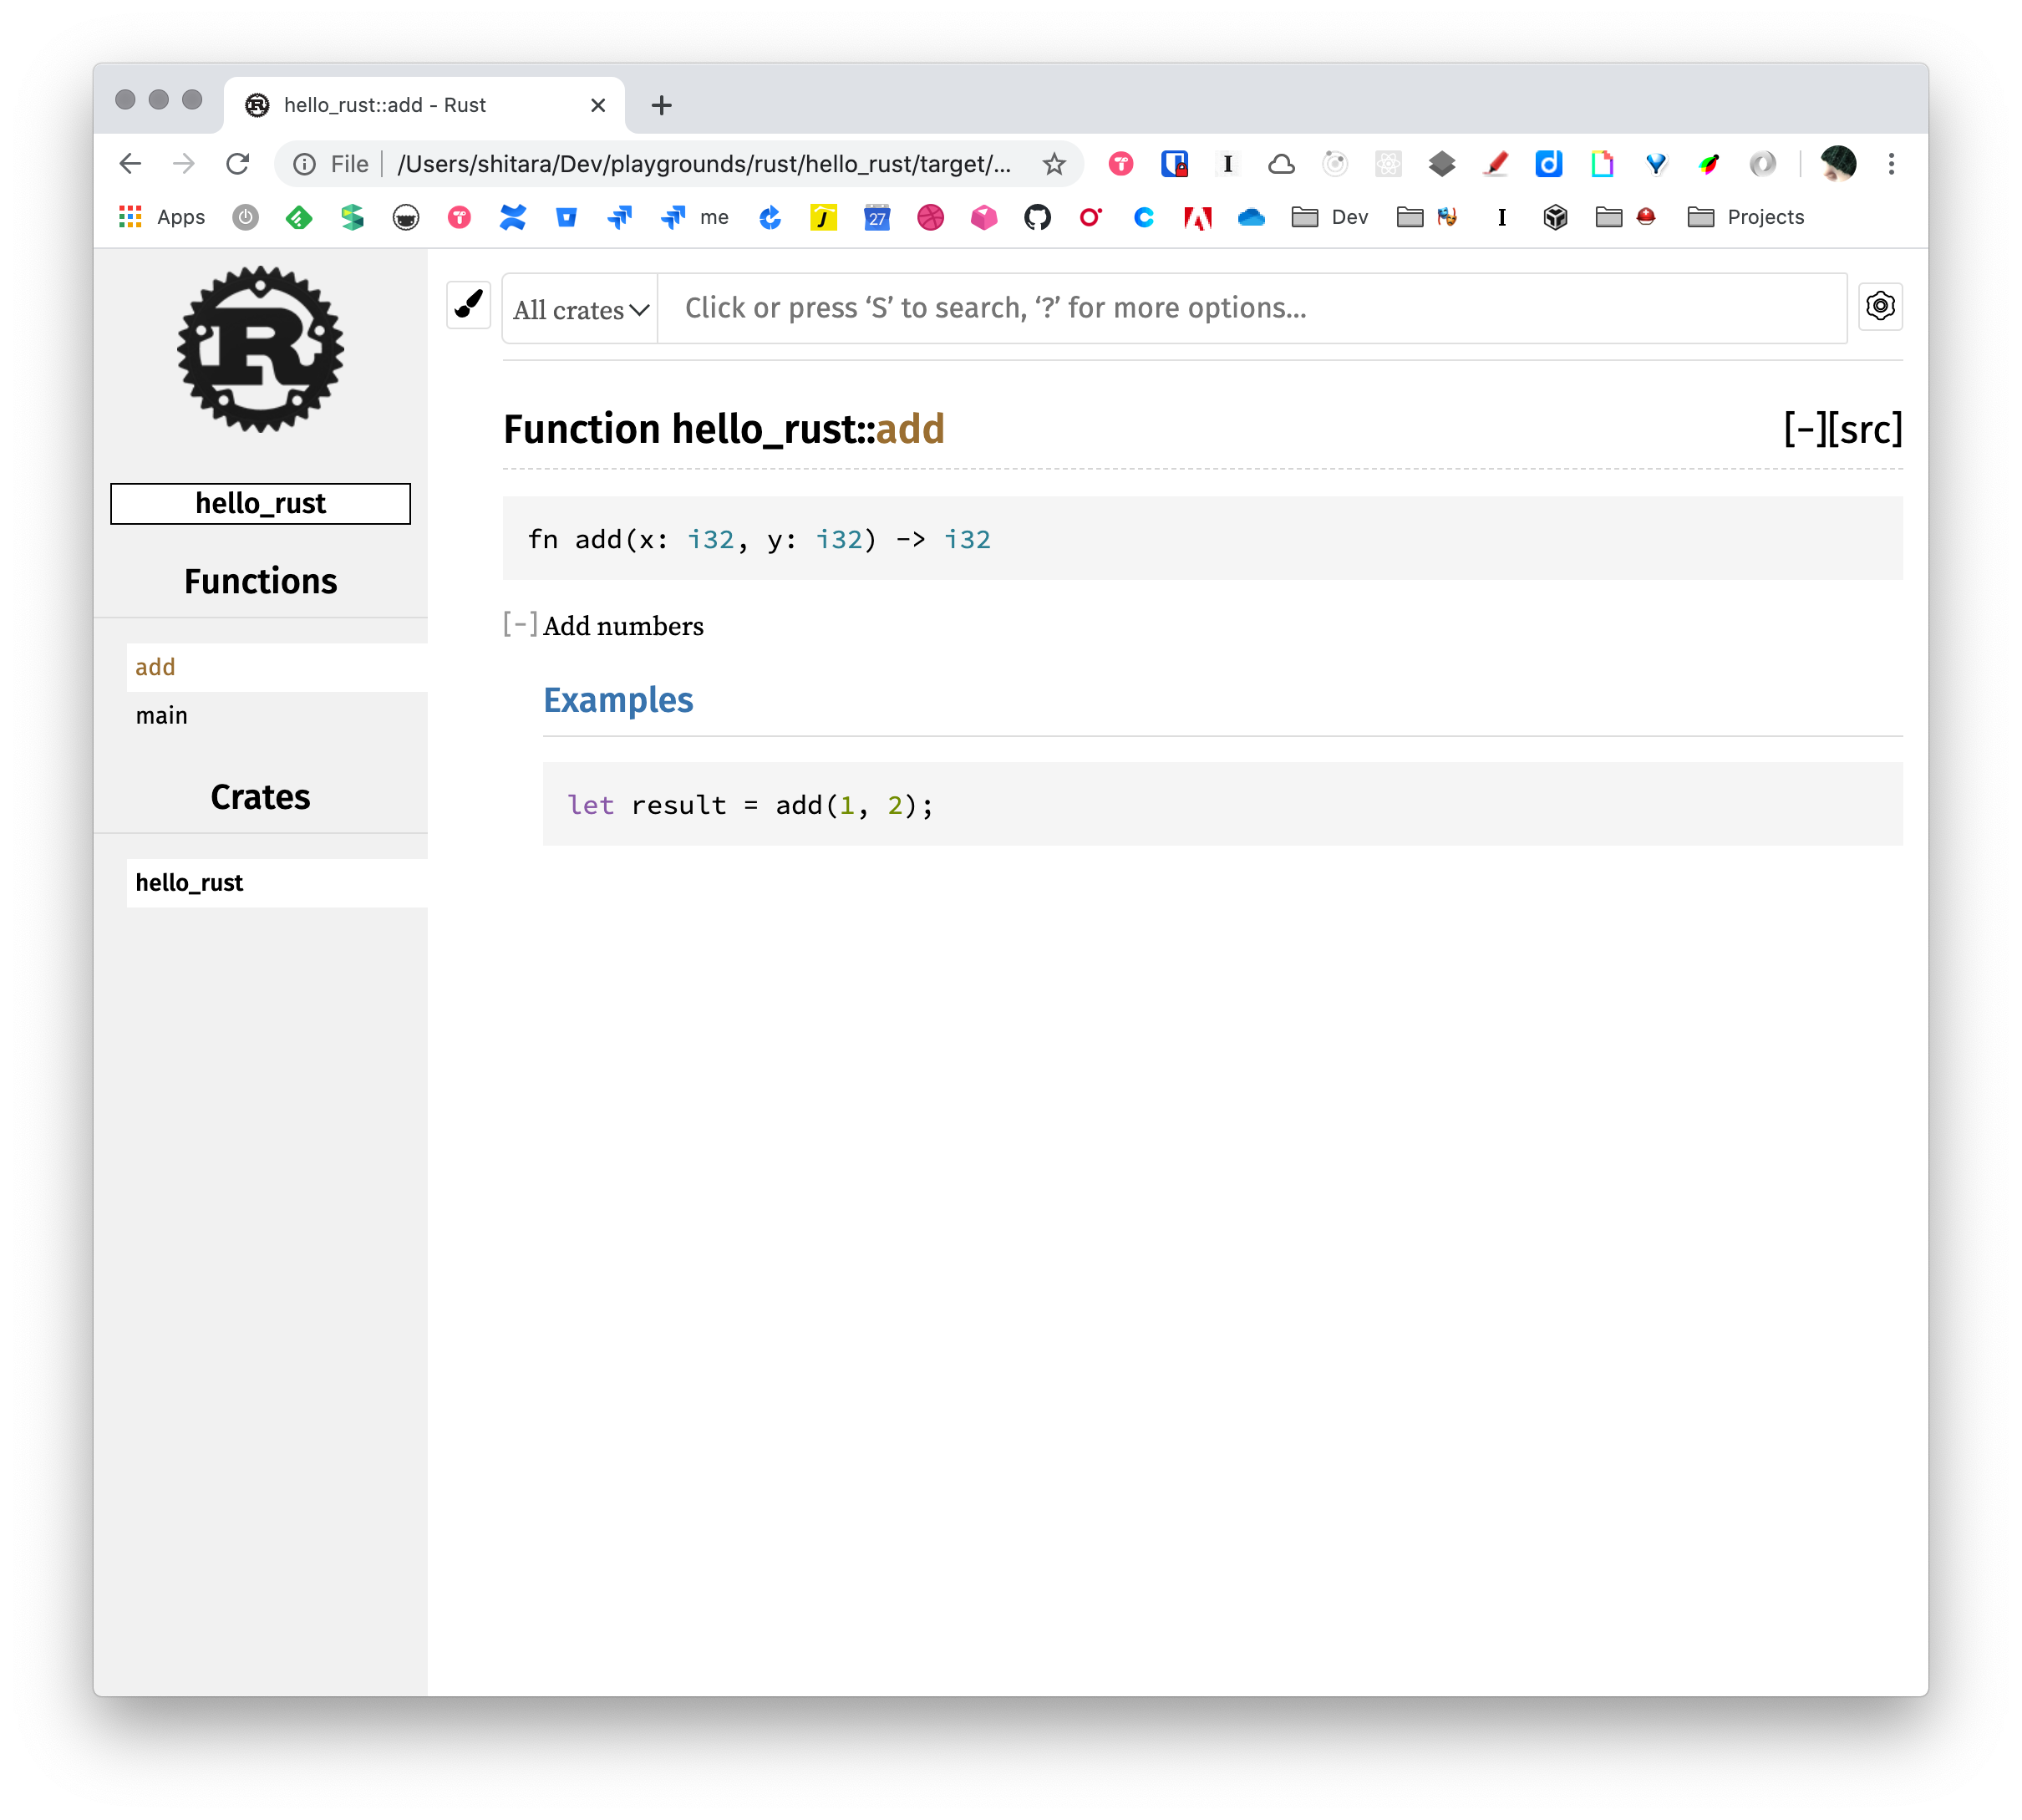
/// Add numbers
///
/// # Examples
/// ```
/// let result = add(1, 2);
/// ```
fn add(x: i32, y: i32) -> i32 {
x + y
}///で始まるコメントはドキュメンテーションコメントで、markdown形式で注釈を書くことで、以下のようにドキュメントを生成することができます:
% cargo doc --open
このドキュメントには開発者が書いたものだけでなく、依存するライブラリのドキュメントも含まれるようになります。試しに randCrateをプロジェクトに追加してみます。
# config.toml
...

[dependencies]
rand = "0.7.3"
➜ cargo doc
   Compiling libc v0.2.71
   Compiling getrandom v0.1.14
    Checking cfg-if v0.1.10
    Checking ppv-lite86 v0.2.8
 Documenting cfg-if v0.1.10
 Documenting ppv-lite86 v0.2.8
 Documenting libc v0.2.71
    Checking rand_core v0.5.1
    Checking rand_chacha v0.2.2
    Checking rand v0.7.3
 Documenting getrandom v0.1.14
 Documenting rand_core v0.5.1
 Documenting rand_chacha v0.2.2
 Documenting rand v0.7.3
 Documenting hello_rust v0.1.0 (/Users/shitara/Dev/playgrounds/rust/hello_rust)
    Finished dev [unoptimized + debuginfo] target(s) in 7.94s
IDE
https://areweideyet.com/
このサイトを見ると主要なエディタ、IDEのサポート状況がまとまっています。 VS CodeとIntelliJが強そうなので、VS Codeを使うことにしました。
拡張は`rust-lang.rust`をインストールします。
https://github.com/rust-lang/rls-vscode
拡張のインストールと一緒に、必要なコンポーネントもインストールされます。Rust Language Serverによって、補完、定義参照、コードの整形、Lintingなどをやってくれます。