どこもかしこも Docker だよ。
今回は Elasticsearch の Docker イメージを試してみます。
環境:
Mac OS X
Docker for Mac
Elasticsearch 2.4
1. elasticsearch.yml の作成
<PROJECT_HOME>/config/elasticsearch.yml を作成し、以下のように設定する。
elasticsearch.yml
network.host: 0.0.0.0
index.number_of_shards: 1
index.number_of_replicas: 0
index.number_of_replicas ... 今回は開発用なので、レプリケーションは行わない。
ゼロに設定しないと Elasticsearch のクラスターステータスが yellow になってしまうため。
2. Docker コンテナの起動
$ docker run -p 9200:9200 -d \
    --name elasticsearch \
    -v "$PWD/index/data":/usr/share/elasticsearch/data \
    -v "$PWD/index/plugins":/usr/share/elasticsearch/plugins \
    -v "$PWD/index/config":/usr/share/elasticsearch/config \
    elasticsearch:2.4
補足:
Elasticsearch の設定ファイルなどはホスト側で変更・保存したいので、-v オプションで以下のコンテナ側のパスをホスト側のパスでマウントしておく。
/usr/share/elasticsearch/data ... インデックスファイルの保管場所
/usr/share/elasticsearch/plugins ... プラグインを配置(kuromoji など)
/usr/share/elasticsearch/config ... 設定ファイルを配置(elasticsearch.yml など)
確認:
$ curl -XGET http://localhost:9200/_cluster/health?pretty=true
{
  "cluster_name" : "elasticsearch",
  "status" : "green",
  "timed_out" : false,
  "number_of_nodes" : 1,
  "number_of_data_nodes" : 1,
  "active_primary_shards" : 0,
  "active_shards" : 0,
  "relocating_shards" : 0,
  "initializing_shards" : 0,
  "unassigned_shards" : 0,
  "delayed_unassigned_shards" : 0,
  "number_of_pending_tasks" : 0,
  "number_of_in_flight_fetch" : 0,
  "task_max_waiting_in_queue_millis" : 0,
  "active_shards_percent_as_number" : 100.0
}
3. kuromoji プラグインのインストール
日本語の形態素解析するために kuromoji を使用します。
コンテナにログインして analysis-kuromoji をインストールします。
$ docker exec -it elasticsearch bash
# plugin install analysis-kuromoji
# exit
<PROJECT_HOME>/config/elasticsearch.yml を編集して kuromoji をデフォルトのトークンナイザーとして設定する。
elasticsearch.yml
...
index.analysis.analyzer.default.type: custom
index.analysis.analyzer.default.tokenizer: kuromoji_tokenizer
コンテナを再起動
$ docker restart elasticsearch
確認:
$ curl -X GET http://localhost:9200/_nodes/plugins?pretty
{
  "cluster_name" : "elasticsearch",
  "nodes" : {
    "UF96jHb_RO2KllKWybq4jg" : {
      ...
      "plugins" : [ {
        "name" : "analysis-kuromoji",
        "version" : "2.4.4",
        "description" : "The Japanese (kuromoji) Analysis plugin integrates Lucene kuromoji analysis module into elasticsearch.",
        "jvm" : true,
        "classname" : "org.elasticsearch.plugin.analysis.kuromoji.AnalysisKuromojiPlugin",
        "isolated" : true,
        "site" : false
      } ],
      ...
}
4. elasticsearch-head のインストール(オプション)
Elasticsearch を GUI で操作するためのソフトです。
$ docker run -p 9100:9100 -d --name elasticsearch-head mobz/elasticsearch-head:2
http://localhost:9100/ にブラウザでアクセスする。

cluster health: not connected になってしまいますね。
原因はこちら。
https://github.com/mobz/elasticsearch-head#enable-cors-in-elasticsearch
<PROJECT_HOME>/config/elasticsearch.yml を編集して CORS を設定する。
elasticsearch.yml
...
http.cors.allow-origin: "*"
http.cors.enabled: true
コンテナを再起動
$ docker restart elasticsearch
確認:
http://localhost:9100/ にブラウザでアクセスする。
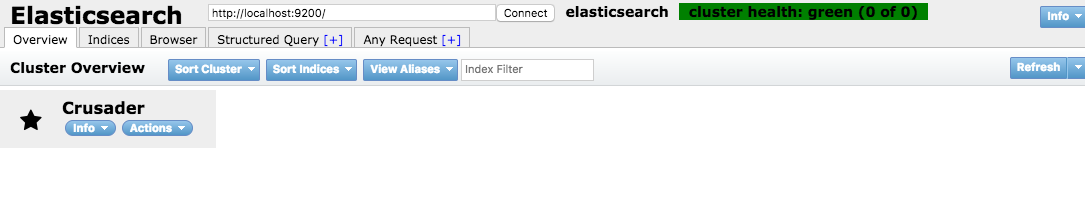
5. ドキュメントの登録
$ curl -XPOST http://localhost:9200/sample?pretty -d '
{
    "mappings": {
        "tweet": {
            "properties": {
                "id": {
                    "type": "long"
                },
                "content": {
                    "type": "string"
                }
            }
        }
    }
}'
$ curl -XPOST http://localhost:9200/sample/tweet/_bulk?pretty -d '
{"index":{"_id":"1"}}
{"content":"絶対は絶対にない"}
{"index":{"_id":"2"}}
{"content":"努力だ。勉強だ。それが天才だ"}
{"index":{"_id":"3"}}
{"content":"ゆっくりと急げ"}
'
6. ドキュメントの検索
$ curl -XGET http://localhost:9200/sample/tweet/_search?pretty -d'
{
  "query":
    {
      "match": {"content": "絶対"}
    }
}'

{
  "took" : 6,
  "timed_out" : false,
  "_shards" : {
    "total" : 1,
    "successful" : 1,
    "failed" : 0
  },
  "hits" : {
    "total" : 1,
    "max_score" : 0.87841576,
    "hits" : [ {
      "_index" : "sample",
      "_type" : "tweet",
      "_id" : "1",
      "_score" : 0.87841576,
      "_source" : {
        "content" : "絶対は絶対にない"
      }
    } ]
  }
}
検索できていますね。
次回は Hibernate Search から Elasticsearch を使ってみましょう。おわり。